

One of the projects currently being undertaken by students in the first year of BA (Hons) Historic Carving: Woodcarving & Gilding is to carve an acanthus leaf design onto a wooden bracket. Tutor Peter Thuring is supporting students throughout this module with tutorials, demonstrations, one-to-ones and a variety of online learning aids. We thought we’d give you a peek into our virtual woodcarving studio and show you what our students are learning.
All the students have received a plaster cast of an 18th century bracket design and two pre-band sawn lime wood blanks, which Peter posted to their homes. Before they start carving their lime wood bracket, Peter is guiding them step-by-step through the preliminary stages: thorough research and drawing; carving a clay model; using a plaster cast design guide.
Research and drawings
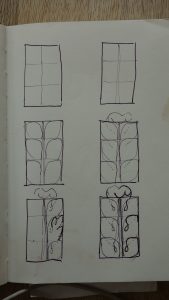
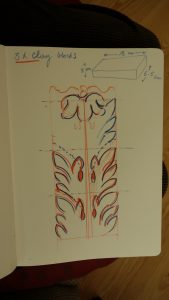
The acanthus motif has been used as architectural ornament throughout history and as such, there are many variations on the design. However, through comprehensive research and analysis, consistent features can be identified such as a strongly defined centre vein with lateral veins tapering down to the bottom of the central vein and the division of the leaf edges into three or five parts. The acanthus design drawing is built up from a basic, symmetrical grid structure, with layers of detail precisely measured and added to the grid to form the final drawing of this ornate design.
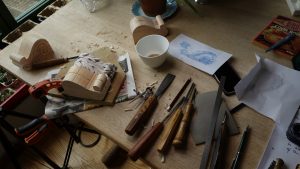
Clay model
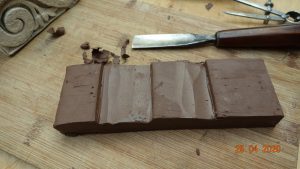
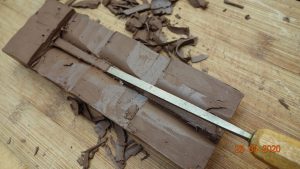
Two blocks of clay, exactly the same size as the lime wood blanks, are prepared by the students and left to dry to “leather hard”. Using their drawings as a detailed guide, they measure out sections and the main volumes in the design, mark them in the clay, and then cut them into the clay with chisels. Taking each section at a time, they gradually and meticulously mark out the full detail of the designs into the clay and, selecting the appropriate chisels, cut into the clay to create a model that will form an exact carving guide for the acanthus bracket.
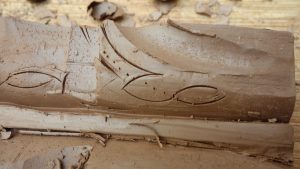
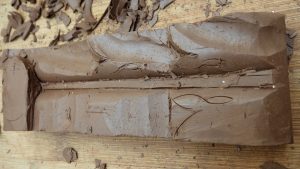
As well as producing an exact model of the bracket design to be carved, this process helps the student carvers understand how the motif design fits together, the relative proportions of each detail and the carving techniques required to create this intricate design.
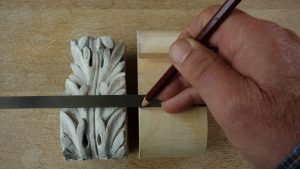
Plaster cast model
As the students don’t currently have access to the Art School’s specialist facilities, their Tutor, Peter Thuring, created the plaster casts for this project from an 18th century model, and sent it to the students along with the lime wood blanks. From the plaster cast, the students can carefully draw the acanthus design onto the wood blank. Different methods are used to achieve this including detailed and accurate measuring and tracing.

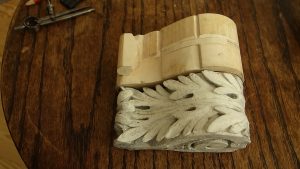
Now the final part of the process can begin – carving into the wood blank…