Since the Art School’s workshops and studios have been closed due to the COVID-19 outbreak and national lockdown, tutors on all our courses have been continuing tutorials, seminars and one-to-ones from isolation at home and students have been working in their make-shift home studios.
Content and teaching methods have been adapted and taught online through the Art School’s online learning environment, Moodle, and other online platforms. Even here in the Historic Carving Department our students are able to continue developing their carving skills from home.
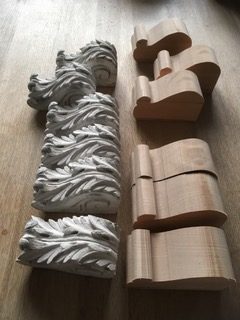
A new project set for first-year students on our BA (Hons) Historic Carving: Woodcarving & Gilding course supports them to carve an Acanthus leaf motif on a bracket. Tutor, Peter Thuring, posted a full briefing paper for the project on Moodle and sent a plaster cast of an 18th century bracket design and two pre-band sawn lime wood blanks by mail to each student’s home.

There are various stages to the Acanthus project. Students have been asked to conduct their own thorough research into Acanthus leaf design as used throughout history as architectural ornament, and create drawings based on their research.
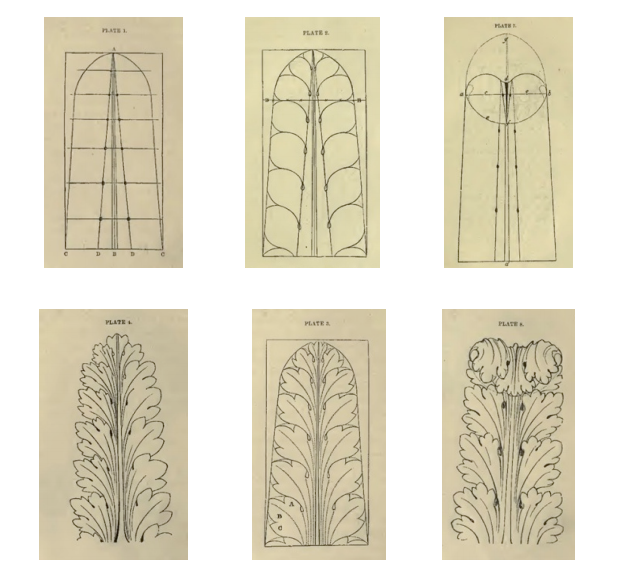
Although there are many different variations in Acanthus motif design in different historical periods, there are also many consistent features. This illustration, taken from a 19th century source shows how the design can be built up from first principles.
Following their research and drawing practise, they need to prepare two blocks of clay and allow them to dry to “leather hard”. These will be used to practise cutting the Acanthus leaf shape and form a clay model on which to base the final carving.
At each stage, from research and drawing to cutting the clay models and finally carving the wood blanks, students will review and discuss their progress with Peter, who will provide feedback and demonstrations to guide them through the process. As well as their hands-on “workshop” practice, students need to keep a carving process log which documents their work in progress and includes their completed models. Along with a self-evaluation form, this will be submitted for assessment at the end of the project in May.
For a more detailed description of the processes our student carvers are undertaking, read our blog ‘Preparing to carve lime wood acanthus brackets’.
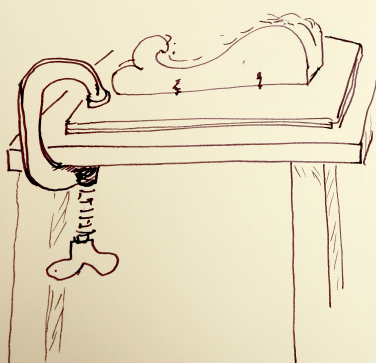
As well as the more structured guidance provided in the project briefing paper, Peter has made some helpful suggestions for completing this carving project at home. He uses hand-drawn diagrams to explain how to secure the carving onto the kitchen table in lieu of a workbench.
Screw the carving onto a small board.
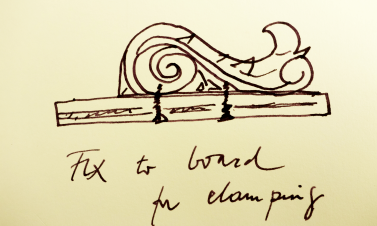
Clamp it onto the kitchen table.
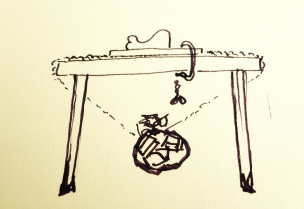
Steady rickety table legs by tying a bag of sand, bricks or gravel with a rope to the table, increasing the load if the table still moves.
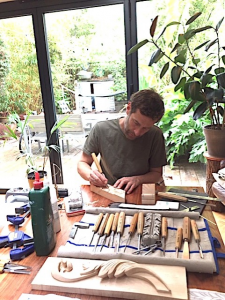
The first-year woodcarving students are just starting this new module and work is progressing well so far. Here’s student Tom Buchanan working on the project on his kitchen table workbench.