

Welcome to weeks 8 & 9 of our student woodcarver’s diary as we chart the progress of student, Paul Flanagan @paulflanaganartist . You can catch up on Paul’s previous carving activities here: week 1, weeks 2 & 3, weeks 4 & 5 and weeks 6 & 7.
Here’s our student woodcarver’s diary for weeks 8 & 9 of the BA course.
Week 8
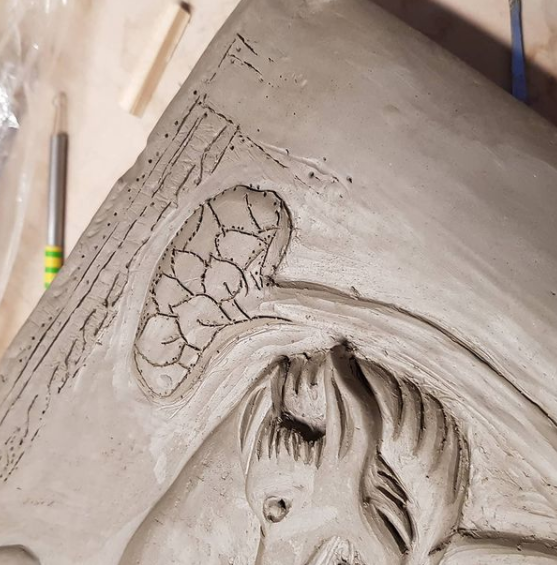
In our last blog, we followed Paul’s endeavours as he was introduced to bas relief modelling in clay as part of the Modelling and Casting Unit led by Sculpture, Modeling & Casting Tutor Kim Amis.
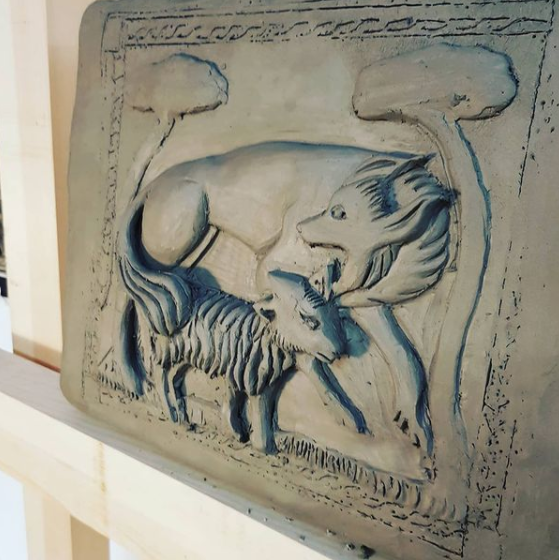
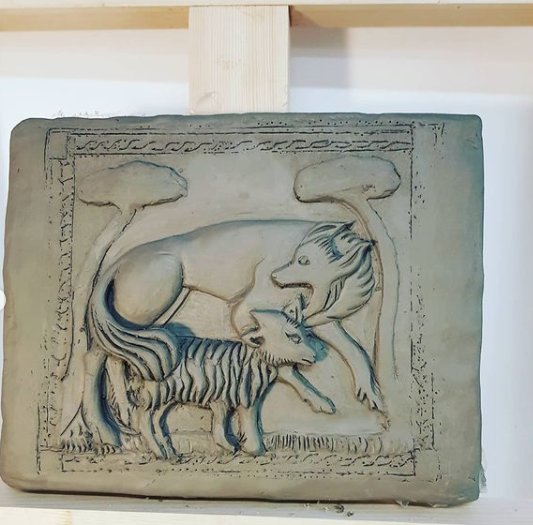
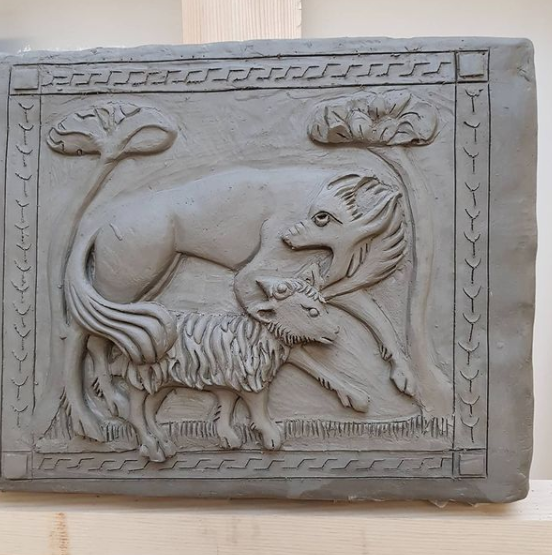
Paul chose to model a medieval image of a wolf and goat, and over a two week period made fantastic progress. Over the next two weeks, he revisists his model and adds the finer details, adding texture to the animals coats here.
The next two days of the week are devoted to lettering which is one of the key skills for carvers, used on monuments, plaques and memorials. This is the carvers’ first introduction to the practice of lettering and there is a lot to cover.
In this Unit, led by Lettering Tutor Mark Frith, the students have to examine and and learn the construction of the letters, focusing on their proportions and the similarities within groups of shapes as well as the origins of letters. They’ll then need to build the carving skills to accurately and consistently carve the letterforms in wood.
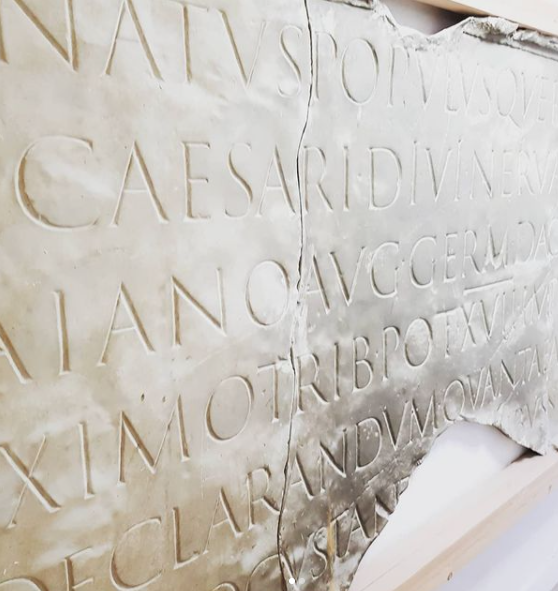
They start today with the Roman Alphabet. After drawing the letters from memory, they use a cast from the V&A Museum as a template to reproduce the lettering on paper.
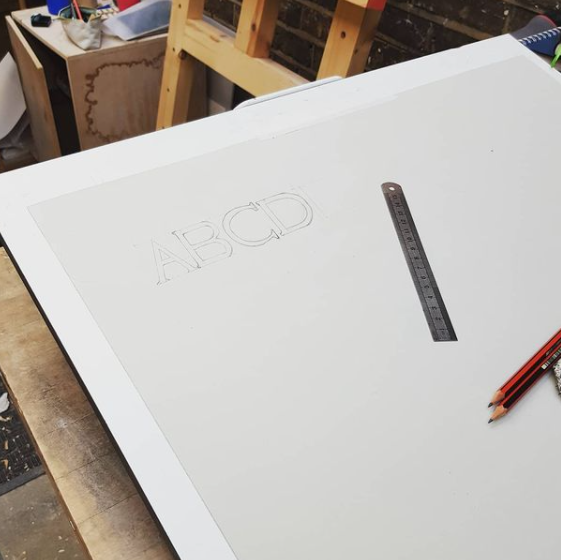
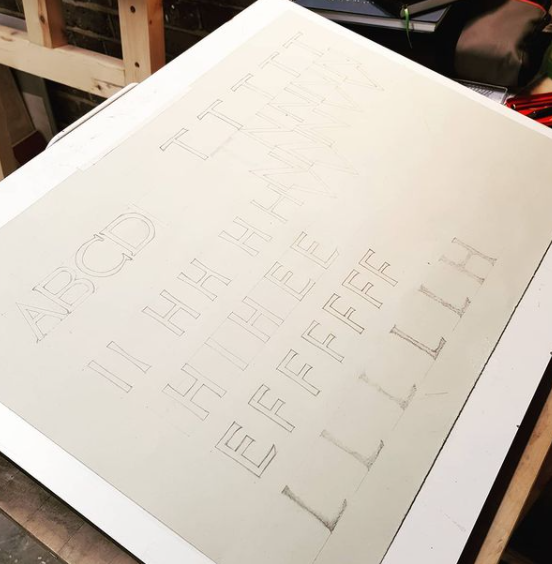
After the two day workshop, Paul says “Quite surprising how much of lettering is done free hand. I thought I’d be using compasses and rulers for every line.” The letter “O” is particularly difficult to master but he has a good first attempt! Paul’s now really looking forward to getting his chisels out and carving the letterforms in wood.
Week 9
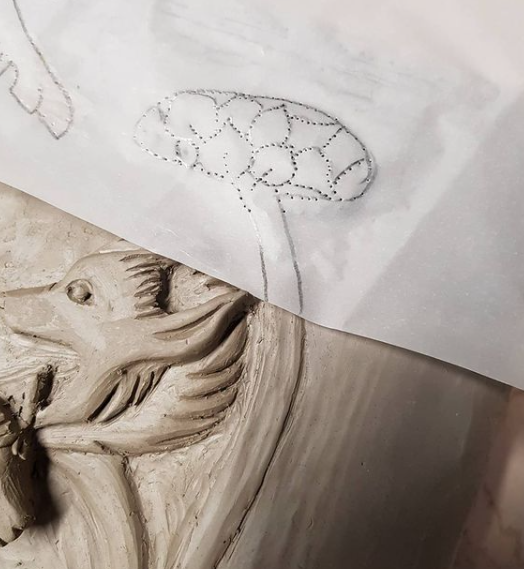
Just over half way through his Modelling and Casting Unit now, Paul’s determined to complete his low relief model this week.
To add further detail to the model, Paul uses the pinprick method to transfer the shapes of the image onto the clay. Et Voila! His model is now sporting a pair of stylised trees and a decorative border. It’s still not quite finished but it’s nearly there!
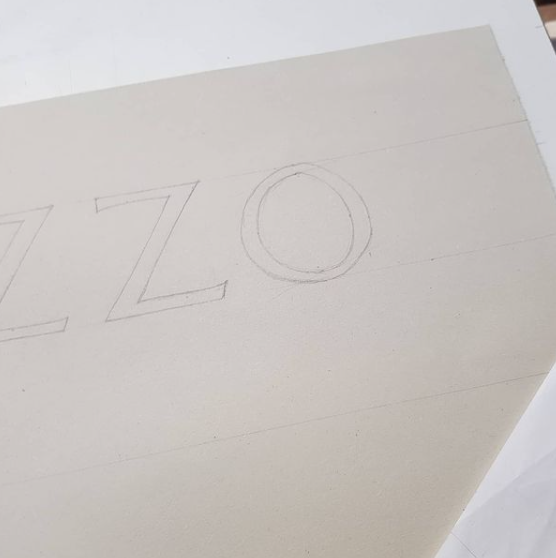
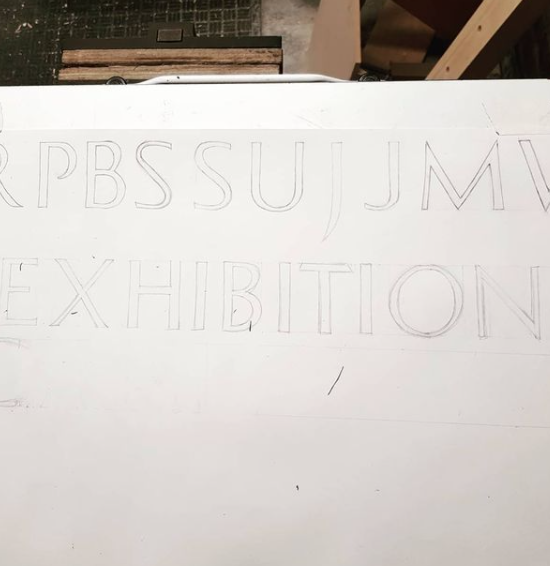
Another two-day lettering workshop follows the modelling and casting sessions and after finishing drawing the letterforms on paper, the students move on to drawing actual words, which requires meticulous attention to spacing and consistency.
On his Instagram post, Paul says, “The word ‘exhibition’ has a tricky part: that is the negative space between ‘iti’ . The ‘T’ shape leaves a lot of space either side of the stem and coupled with very thin ‘I’ shapes makes a tough time of getting the word to look balanced. You can see 2 examples, the 2nd looking a lot better than the first.
They are a bit hard to see as I had to draw/ sketch them very lightly.”

And that brings us to the end of this blog post. In the next post, the woodcarving students will finish their clay models and revisit the oak leaf carving they started a couple of weeks ago.
Photos courtesy of Paul Flanagan